Overview
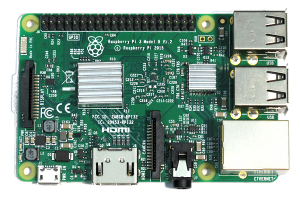
This web page provides resources for using the Raspberry Pi single board Linux computer, which is made and supported by the Raspberry Pi Foundation. This board was originally developed in the UK to promote teaching computer science in schools and ended up being wildly popular selling over 10 Million Pis in the first three and a half years. Since its release in 2012, the Raspberry Pi hardware has been revised several times. The image below is of the Raspberry Pi 3 Model B, with optional heatsinks. I also have the Raspberry Pi 2 Model B, and the Raspberry Pi 1 Model B+, and as time permits I will try to ensure that the projects work on each version. For the most part, projects created for one version are forwards/backwards compatible with others, with maybe just a few tweaks needed.
The schematics for different RPi versions can be found here. Although the software is "open source", the hardware is not "open hardware", and for most RPi versions only reduced schematics are provided. Although I'd be curious to see the full schematics, this isn't really a problem.
The software for the Raspberry Pi can be found here. There are several operating system images to choose from. I am using the RASPBIAN image, and highly recommend it unless you have a specific need or desire to try a different one. Although there are several version of RPi hardware, the developers have done a pretty good job of ensuring that the software image remains backwards compatible for all previous RPi hardware versions. The bigger problem is actually that the software changes are not always backwards compatible with the project examples, because they change low-level hardware behavior assuming that no one will notice. I will try to provide compatibility recommendations where needed.
Making the Raspberry Pi "Project Ready"
In order to run the project examples from this site it is necessary to make your Raspberry Pi "Project Ready". This takes a little more effort than just loading a Linux image. This process will ensure that all of the low-level hardware features are enabled (such as UART, I2C, SPI, and GPIO), and will configure the Linux image to be compatible with autonomous project needs like auto-launching Python scripts at start-up, disabling screen blanking, etc.
The latest step-by-step instructions for making the Raspberry Pi "project Ready" can be found here:
Previous step-by-step instructions for making the Raspberry Pi "project Ready" can be found here:
Projects and Examples
The following section contains examples of Raspberry Pi projects.
| Example | Summary Description |
|---|---|
| Add Flashing Lights with Piglow |
This example provides a Python tutorial script that demonstrates how to make different LED patterns using the Pimoroni Piglow module. Requires: a "Project-Ready" Raspberry Pi, an HDMI display, keyboard and mouse, and a Piglow Module. |
| Serial Data Logger with Display |
This example provides a Python script that is automatically started at power-on to receive serial data from an external source using the 'serial0' UART input, and then timestamps and logs the data to an HDMI display and a connected USB drive. The example uses an RPi mounted to the back of a SunFounder 10" LCD display, however any HDMI display can be used. The example uses an MSP430 development board to stream serial data, however alternate serial data sources can be used. Requires: a "Project-Ready" Raspberry Pi, an HDMI display, a USB drive, and a serial data source. (keyboard and mouse are optional) |
| Hacking Minecraft |
This web page provides instructions for hacking the Minecraft Pi edition game. It includes step-by-step instructions to help someone that is new to programming get started with controlling the Minecraft game. Requires: a Raspberry Pi with Minecraft and Thonny installed. |